
October 4, 2024
Fact or Fiction? Debunking Radiology’s Biggest Ergonomic Myths
Josh Patrick
READ NOW
March 15, 2026

Home interpretation is no longer limited to on-call coverage. For many groups it has become part of the core operating model—supporting routine daytime reading, schedule flexibility, and retention in competitive markets. As home reading becomes structural, the workstation needs to be treated as a standardized clinical endpoint—not an ad hoc “home office” arrangement that varies by individual preference. The objective is practical and measurable: reduce avoidable strain and fatigue, improve consistency across long reading sessions, and create a repeatable way to identify and remediate ergonomic risk factors. This article focuses intentionally on physical ergonomics—monitor positioning, seating and work surface setup, lighting and glare control, and habits that reduce static loading over long shifts. It is written for managers who want a simple way to assess reading spaces, and for radiologists who want a defensible baseline they can maintain over time. To keep it actionable, the remainder of the article follows a short framework and then provides a checklist you can use during initial setup and periodic re-checks. The goal is not to prescribe a single perfect workstation, but to define a consistent baseline and a practical validation routine that helps small issues from becoming larger problems in the future.
To make home workstations consistent, it helps to think in a small number of control areas. At Redrick, we believe equivalence is achieved when these elements are set up consistently and remain stable over time:
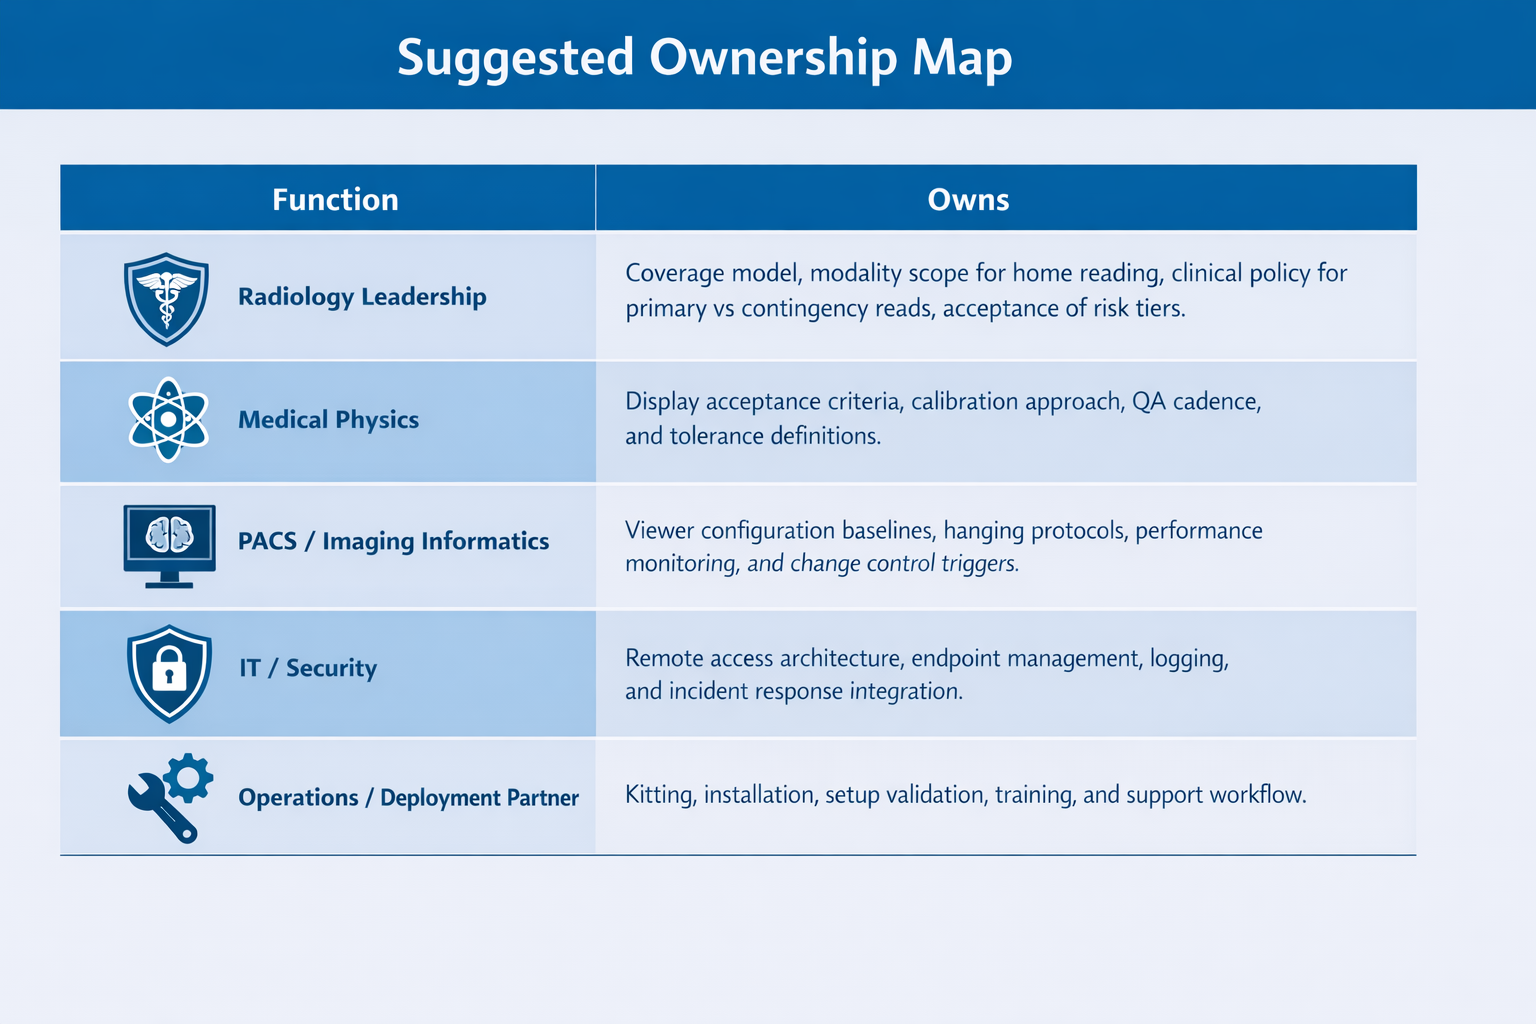
Ergonomics holds up best when responsibility is explicit. Whether the workstation is at home or on-site, there should be a clear owner for maintaining a healthy reading environment—and a simple process for implementing corrections and re-checking the setup over time.
At minimum:
Use this checklist during initial setup and then re-check periodically (for example: after moving rooms, changing chairs/monitors, or when discomfort develops). The aim is to identify issues that are easy to fix—before they become persistent.
Poor monitor geometry is a common driver of neck/shoulder strain. The goal is to keep the primary diagnostic displays centered and to reduce repeated head rotation and forward head posture.
There is no single “ideal posture” that can be held indefinitely—this setup should make periodic, small adjustments (including changes in eye-to-screen distance) easy and routine.
A supportive chair and an appropriately set work surface reduce static loading in the neck, shoulders, and lower back. Aim for a neutral posture that can be easily re-established after adjustments.
Even an ideal posture becomes problematic when held for hours. The objective is to make small posture changes low-friction and routine. There is no “ideal posture” that can be held indefinitely; across long sessions, comfort depends on frequent small changes (monitor height/distance, seat position, and reach zones) rather than holding one “perfect” posture.
Glare and poorly balanced lighting contribute to visual fatigue and headaches and can encourage awkward postures (leaning, squinting, twisting).
Cable strain and clutter are often treated as cosmetic, but they can limit adjustability and cause the workstation to drift back into poor positions.
Two practical workflows tend to work well:
Documenting the result is useful even for small programs.
Home reading environments can be comfortable and consistent when physical ergonomics is treated as a repeatable standard: stable monitor geometry, supportive seating and work surface setup, controlled lighting, and a simple validation routine that catches drift early.
Click here to download the full Redrick Ergonomics Checklist.
2025 © RedRick Technologies.
All Rights Reserved.
Web design & developed by Duco Media & Kick Ass Digital Media


